Friday, December 14, 2012

Love the Children

My mind just can't grasp the facts, my heart aches at the news, and my soul cries out for the children (and adults) killed today.  I'd like to share a portion of what one of my friends wrote:

In our time of dispair, it is my hope that we, as a nation....as a world can remember to be the light in the darkness. To show the love, and compassion. To embrace our friends, and family. To reach out to those we meet. To put down our phones, laptops, and ipads, and fully connect with those around us. Be present....be aware......offer help....offer love. There is so much mental illness in our world. So many people who feel lost....helpless....hopeless....and angry. We must be part of the solution. Our children are counting on us.
 
We must love our children. All the children in our lives.  Please, try harder if you must, but love...

~~~~~~~~~~~~~~~~~~~~~~~~~~~~~~~~~~~~~~~~~~~~~~~~~~~~~~~~~~~~~~~~~~~~~~~
My JOY of the day was spending time helping to decorate gingerbread houses!  For the past several years I've held Gingerbread House Making parties here in our home (for all our grandchildren and any other children I could gather!).  But this year Melissa put on a party at her church for the mommies and children so I went to help and bring more children! 

When I walked in the door our granddaughters came running up to me, "Grandma!"  I grabbed them and hugged and kissed and just loved on them.  Their sweet smiles and voices filled my heart with JOY.

(Melissa with Claira, who was chowing down on candy!)
 
We ate candy, decorated the houses and even had lunch served to us (those Bridge gals are the best!).  Most of the children were young, the older ones were in school, so the houses were extremely loaded with candy! I had to laugh when I realized how long they took "decorating", piece by piece to get their houses looking perfect, when at a glace it look like a mound of candy!


Ells-Bells loved all the candy, too!  But she worked hard on her house,consentrating on her "work" and did a good job limiting her candy intake.  I will admit: at one point I caught her sucking on icing tube....LOL


Pure JOY for this grandma to be here today with the children....
 
Blessings and love to you.
 Heidi
 

Saturday, December 1, 2012

Christmas Family Countdown Calendar Board


Years ago Melissa and I made Christmas Family Photo Countdown Calendar boards.  Mark cut the pine boards, cutting the corner rounds.  We painted the edges green then Melissa and I decoupaged pages from a vintage cookbook (picking the sweets pages) and then antiqued it a little with stain. We used wooden letters for "FAMILY", glittering them first.  We painted "Tis the Season for..." with black paint, but you could easily use a black Sharpie marker.


We went through our photos and cut out pictures of family, gluing them on scrapbook paper, then attaching eyelets with our Cropadiles.  I made a grid of paper, evening distributing the marks for the nails to line up perfectly, then nailed them on the boards (after the board dried) for the photos to hang from. I just used small nails we had in the shop.

This has been one of our favorite Christmas projects ever.  It's timeless...well almost, we have new additions to the family since we made them.  But you could switch out the photos every couple years.  The year Jessica and Craig were married I made a Family Christmas Countdown board for them, using photos from the years they had dated and from their wedding! 

Tonight while doing my Pinning "work"  (LOL!) I saw one of my sisters had pinned this Christmas craft!  I immediately knew what year it was and where to find the instructions (on a ripped out magazine page in my "save" drawer~). But now days we don't have to rip out magazine pages, we can just pin on Pinterest

You can find the directions from BHG here:  Family Photo Christmas Countdown.  Here is their version on of the board:


Still getting our Christmas decorations out and up.  Mark put up the outdoor lights today.  I've got a good start on my theme colors for the year, "black, white and red all over".  Here's a wall set I put together:


Have a blessed Sunday! ~ Heidi


{Linking up with:}

Wednesday, November 28, 2012

Black and White and Red All Over Christmas

(unknown online source)

Do you remember this old children's riddle?  "What is black and white and read all over?"  When you ask the question it sounds like the color "RED"!  This is my theme for our Christmas decorations this year. 

{{Did you get the answer to the riddle?  The newspaper!}}

To start I have a sign I painted:  "Christmas Blessings".
 
...and of course, the sign that every family needs..... "No Pouting Zone" sign!

 
and then my most favorite operative word for the Christmas Season...
" JOY" sign!
 

I've been "working" on Pinterest, trying to find black, white and red Christmas inspiration.  There's really not a whole lot out there, but you can take a look at the "board" I'm pinning to here.

What color(s) are you loading up on for your 2012 Christmas decor this year?

Have a blessed day!
              ~Heidi

Monday, November 26, 2012

Cyber Monday Special at Everyday Cookies Etsy shop!


Cyber Monday shopping? Well I'll offer a deal here too!  If you place an order from my Etsy shop Monday, November 26, 2012 I will give you FREE shipping.  Yep, free shipping~but only for orders placed today,  Monday, 11/26/12.

When you checkout once you've made a purchase use the coupon code:
                         CyberMonday
And you will have FREE shipping!


Perhaps you'd like to order a custom family sign?  A perfect family gift!


Thank you SO much if you come shopping with me today!
             Blessings,
                      ~Heidi

Tuesday, September 25, 2012

The Ring Bearer is now the Sign Carrier

It's been busy over at my Etsy shop, Everyday Cookies Custom Hand Painted Signs.  One of the new signs I've added has been wonderfully received.  In wedding processions the little boy used to always be the "ring bearer".  But often, because of his young age, he couldn't be trusted with the Real Ring, so he had a fake little ring tied on a satin pillow, which he may or may not drag on the floor.  But guess what? Something new!

The "ring bearer" is now the "sign carrier"!  How wonderful is this new tradition for the little man in the wedding?


I've painted many varieties, from "Uncle Adam...", to "Hey Mike....", and even "This is my Mommy....".   I'll paint whatever fits your wedding!  If you purchase just let me know what you want.


I hope all the girls had fun at Handmade U.  There's nothing like packing up all your best crafting supplies in a little suitcase then joining like-minded crafters for a weekend of fun!  New friendships are always made, and the crafting almost becomes secondary to the visiting.  Maybe that's how it was in the old days when the women would get together to quilt.  I don't quilt, but if I did it would be for the visiting!

Blessings, Heidi

Tuesday, July 31, 2012

Handmade U

Yay!  An art retreat you can attend this fall! 


Handmade U is an all inclusive art retreat where artists from all over the country gather to create, laugh, bong, shop and ....eat cupcakes! I won't be able to attend, but I will be a sponsor!

The instructors and projects for this event will be wonderfully creative. Just to drop a few names as far as instructors go, you'll get to take classes from Hope Karney Wallace (journal making and lettering class) and Liesel Lund (vintage children's book journal class, involving painting, collage and altering the books), and more!

This event will be held in Omaha, NE on September 20-22, 2012.  (Remember Omaha NE from "Silver Bella" of past years? I enjoyed the town a few years back when I was able to attend Silver Bella.)  There are a limited number of sign-ups, but still plenty of room for you!

Check out the blog for more information, such as costs, sign-ups, locations, and more.

Blessings, Heidi


Friday, July 6, 2012

CSI Challenge: Frozen Treats and Push-Up Pops

Want to have weekly challenges?  Start here, at Create Something Inspiring! Each week there is a challenge, sponsors, winners and more!  You can follow CSI on Facebook here.

The challenge given to me for this week’s CSI July Project Tutorial was “Frozen Treats and Push Up Pops”.  Great topic for summer, unless you live on the Oregon Coast, where some are still keeping their wood stoves going this month!  But I have confidence that the sun will shine and Oregon will warm up soon, so I will have my Frozen Treats ready!
(my photo)

I immediately thought of my box of empty TP rolls.  I save them, as you never know when you need 50 empty TP rolls!  I thought they’d be great for this homemade push-up pops challenge.  Challenge it is!  I experimented a little but didn’t quite get that project off the ground—or rather out of the freezer!  I just couldn't wrap my mind around eating something from a TP tube! LOL  I quickly moved on to my next idea.
I’ve seen those Frozen Dots treats once or twice and I thought it’s be great to make those.  However I found I would need an industrial freezer that get’s way colder than mine, as well as some high tech chemistry knowledge.

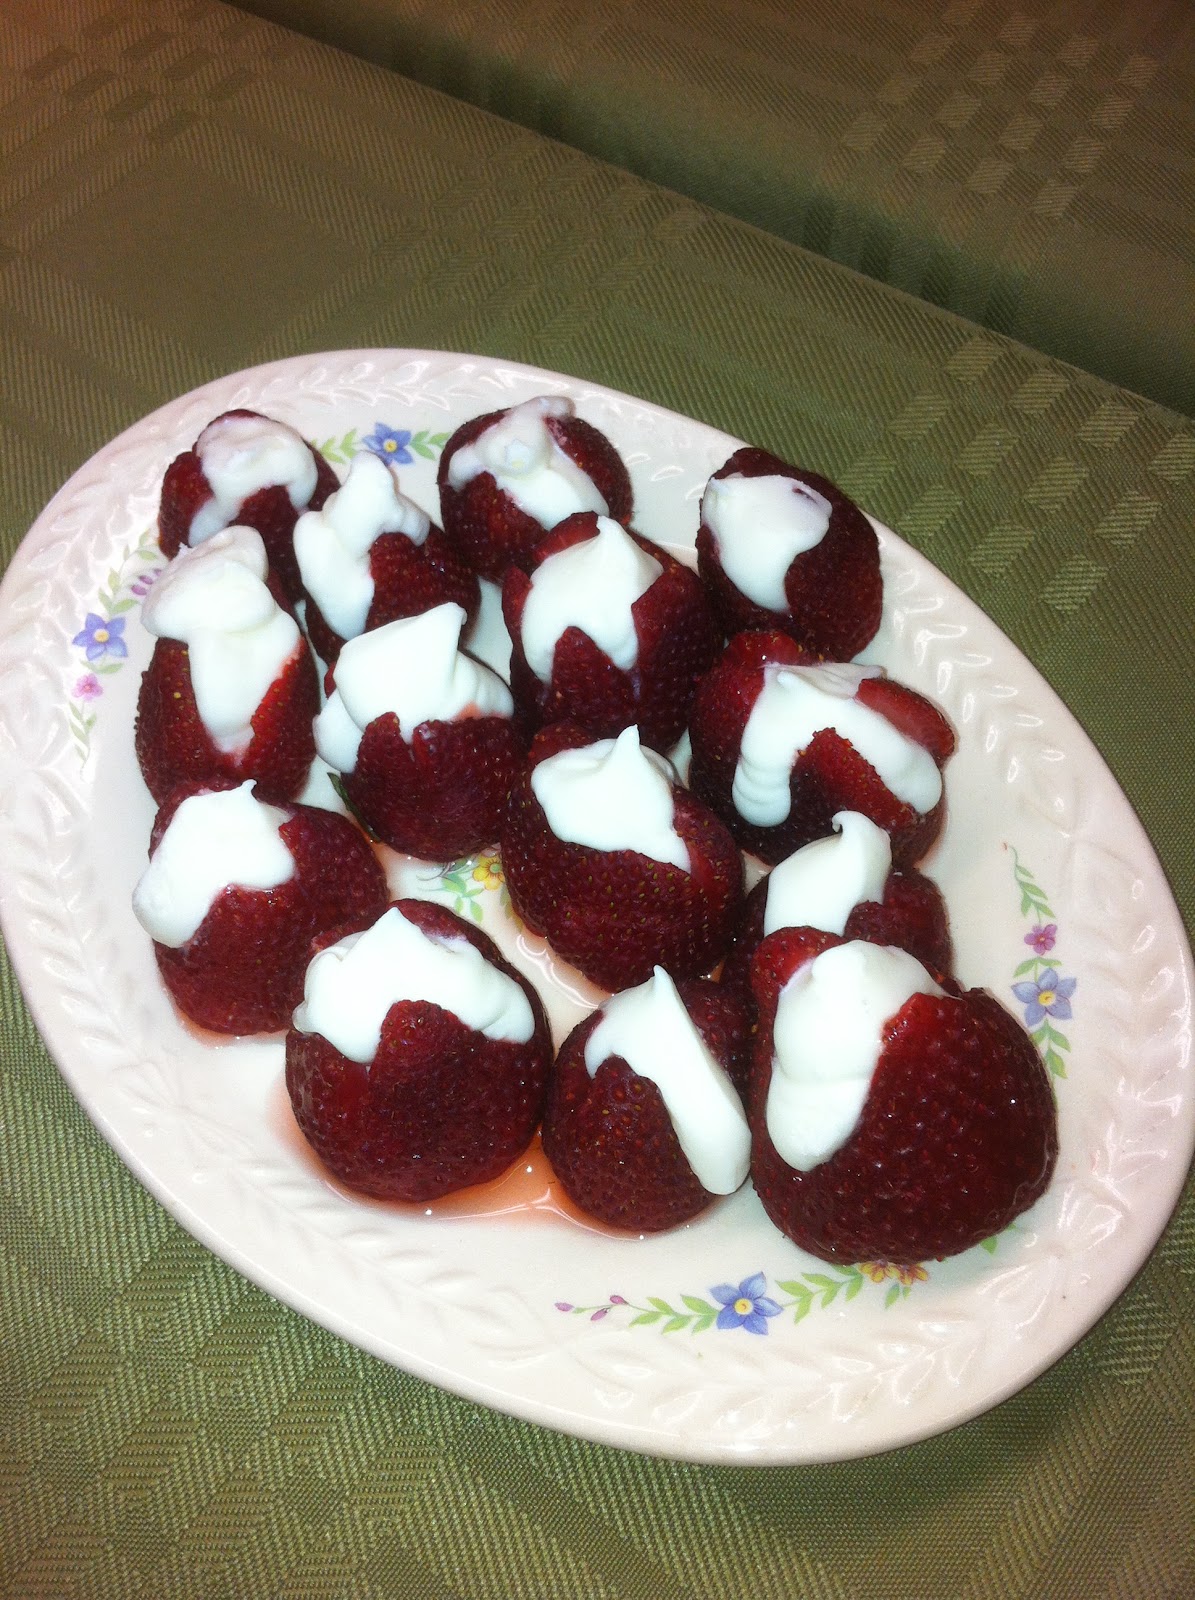
Then I moved on to making frozen yogurt , homemade.  You know, the kind that comes out of a big tank at the FroYo shop?  Hum, not really possible at home!  But the idea of freezing yogurt IS possilbe. I'd seen some "dots' around online and thought of trying that out. 
I’m pretty sure any yogurt will work, but I only experimented with my favorite, Yoplait.  Put the container of yogurt in the freezer for about a half hour, to firm it up so that you can make use the decorating tips. If you use it right out of the refrigerator it’s too running to do anything but make a glob.

You can use decorating bags or even a plastic Ziploc bag. I buy a the 100 Count box of Wilton’s 12 inch Disposable Decorating Bags and use this all the time, but primarily for my annual Children’s Gingerbread Decorating Party. 

Put your tip in the bag then screw on the holder on the outside of the bag. Cut off the end of the bag for an opening, (Cake Decorating 101 here!).  I set mine in a tall glass (notice the vintage Coke glass) and then fill the bag with yogurt.

Find a cookie sheet, pan or even a plate that will fit in your freezer, then just drop DOTS!  I use Silpat matts for just about all the baking in my kitchen, and now will use them for the freezer dots.  

Pop the dots in the freezer and leave for at least an hour or two.  Done!

Now for a few more variations on this easy project...I thought, “What other dots could I drop?”  It needs to start as something rather thick, not running or watering…
Pudding...Pureed Bananas..Applesauce...I'll let you know how these "pan" out! :)

Now, to futher inspire you on Popsicle making, this is a must save listing:
 30 Homemade Popsicle Recipes... You won't go away dissapointed!

---One other quick idea for children:  Cut a small hole in the bottom of a plastic disposible cup and put their popsicle stick through that to save drippings from getting all over their arm!  NOTE:  this method is also perfect to hold the sparklers on the 4th of July!  (Save that thought for next year!)

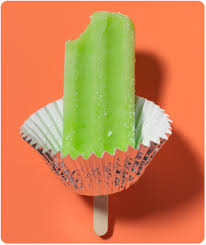
(online photo source)
----Or, just use a cupcake holder!
(online source)

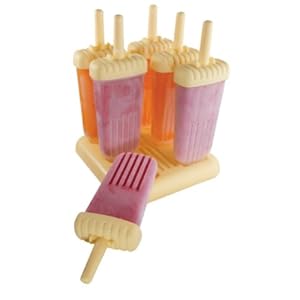
----Also, if you are looking for popcicle molds, and you don't have very many store options nearby, just shop Amazon.  Type in "Popcicle Mold" and you'll be AMAZED at all the new molds they make now.  This is the one I'll be ordering, Tovola Groovy Ice Pop Molds.
(I just love the "grooves" and the color--not so bright!)


Thank you for visiting and stay cool!
Blessings!
~Heidi

Saturday, June 30, 2012

Repurposed Wood

Just so you know....Pinterest rocks!  Real quick...I wanted to share with you a wonderful repurposed Pinterest board that the pinner has loaded with repurposed wood projects.  I have made many of the headboard turned benches in the past, and there are links for a lot of those. 
(from Pinterest)

Here's a bench I made...(with Mark's aid when necessary)...and a barnwood sign I made for a wedding.  I photograph ALL my signs on a these homemade repurposed benches for my Etsy store!
(my photo)


My daughter (Melissa) just made her crib, used for all three of their children, into a fabulous black patio bench.  There are pins for crib projects on this Pinterest blog.
(from Melissa's photos)

Down the road we have a big pile where people have thrown stuff to be burned (not us, we burn here on our own property).  Someone must have been remodeling their home as one day I found a bunch of old doors.  So I loved all the door project on this "Repurposed Love" board. Can't wait to make something, anything!

Maybe this....
(from Pinterest)

Or this...
(from Pinterest)

I just love this project, I've wanted one of these for years and years:
(from Pinterest)

Last week at CSI (Create Something Inspiring) the "challenge" of the week was "wood projects".  Check out the winner and some other great projects here.

Just wanted to give you some Saturday morning wood projects inspiration! Go...build something!
         Blessings, Heidi

Wednesday, June 27, 2012

Hello friends! Yes, I'm still around! It's just that between all that I'm trying to do something had to give, and it was my blog! My intention is to post occasionally, so here I am! So much going on, but one of my favorite activies is to.... BE GRANDMA HEIDI!

Summer in Oregon begins, oh, say....around August 1 and ends...oh...say about September 1. Just kidding! But summer on the southwestern coast of Oregon DOES get off to a slow start! I had the grandkids here for a few hours yesterday and though I wanted to have them slide down the slip-&-slide like this time last year...

(last year)

..it was chilly out so I built a little fire in our outdoor fire pit and had them roast marshmallows.

Mark made this heavy metal fire pit for me last year. He cut and welded all the pieces, making it the exact height I asked for, welding on "legs, then painting it black. I think he used 1/2" metal, because this fire pit is h*e*a*v*y--luckily my brother was here the day Mark moved it out of the shop!


(last year)


Ellie's marshmallows immediately caught fire...


But she ate them anyway! She had melted marshmallow all in her hair and on her clothes, but I knew I was sending them home soon...that's how Grandmas are, you know!

Claira just sat in a chair watching...and eating...it wasn't necessary to toast her's!

John Mark ever so patiently barely toasted his, he was so careful to NOT have any charred marshmallow.

We also played around with the sidewalk chalk:


 So what else?  I continue to spend moments on Pinterest (while on HOLD on the phone, as I'm working! I can PIN a LOT while on hold!!! LOL)...
        Here's just a sampling of a few Pins I actually did:

(filled strawberries...a sweeten creamcheese filling!)

(banana white chocolate chip biscotti -- these are SO GOOD!)


(homemade Ritz crackers... again SO good!)

Time to get some work done! 
Thanks for visiting and blessings to you!

   ~Heidi